
We can so do this!
http://idav.ucdavis.edu/~okreylos/ResDev/SARndbox/
Reference: AR Sandbox Complete install instructions
We can so do this!
http://idav.ucdavis.edu/~okreylos/ResDev/SARndbox/
Reference: AR Sandbox Complete install instructions
So I built this AR Sandbox. It was great fun for me, and a little bit for my kids. After a few months of play and showing a few people I didn’t know what else to do with it or have place to hand it off to so I ended up disassembling and re-using the parts. If I’d found an easier way to replicate and build a model of the real world with it it might have had a longer life. I might come back to this some day still though.
Other than what’s already posted here in the blog, the only remaining item of interest a stop animation movie of The Hobbit the kids made for school using the sandbox.


By the time they’d finally finished they were sick of the whole exercise and very nearly didn’t even hand it in. A lot of time was spent spinning and fighting with the software used to put the animation together. They had to re-assemble the shots many times because of it’s shortcomings. An important lesson for any future facilitating I may attempt: small (idiot) things that have to be repeated again and again can suck the morale out of a project very, very quickly. Put guards in place against that ahead of time!


Automatically move the sarndbox window to the projector screen when it starts. Works more or less, but sometimes misses and have to quit and restart sandbox 2 or 3 times
devilspie – daemon
gdevilspie – gui helper
( if
( begin
( is ( window_name ) "SARndbox" )
)
( begin
( maximize )
( fullscreen )
( geometry "+1441+0" )
( println "match" )
)
)
 Our initial batch involuntarily donated by a local sand/gravel operator on McLean Lake road. (No sign on gate or washing machine, couldn’t identify who to contact. They normally sell by the truck load, I don’t think they’ll mind 6 laden pails walking out on their own. If this operation is yours, contact me and we’ll square up.)
The sand is a grey to brown colour, so was initially concerned it wouldn’t be bright enough for the projector. That was no problem (see site logo image), but the dust level was.
It took about 4 hours to wash the silt and fines out, could have been done in 2 though. Tip: plop the sand in a big plastic tote or old style wash basin, enough to hold half or more of the sand at once, plus about 6″ (10cm) of free board, then just set the hose or bathtub water to run constantly, stirring bottom occasionally, until water runs sorta clear (or you lose patience and say “good enough”).
Washing darkened the sand about 10%, but didn’t impact projector image enough to be concerned about it. Definitely brought the dust down to a manageable level.
Keeping somewhat moist with an occasional few cups of water helps also, in addition to allowing more variety in topographic construction. Drawbacks: wet sand clings to fingers, so frequent wiping with a cloth needed when going and forth to keyboard etc. Also when it does dry there are clumps that need to be broken up (quick and easy enough, just one more step before presenting to a new batch of people).
An alternative for moisture is mineral oil (a.k.a. baby oil); suggested by Larry K., haven’t tried it yet.
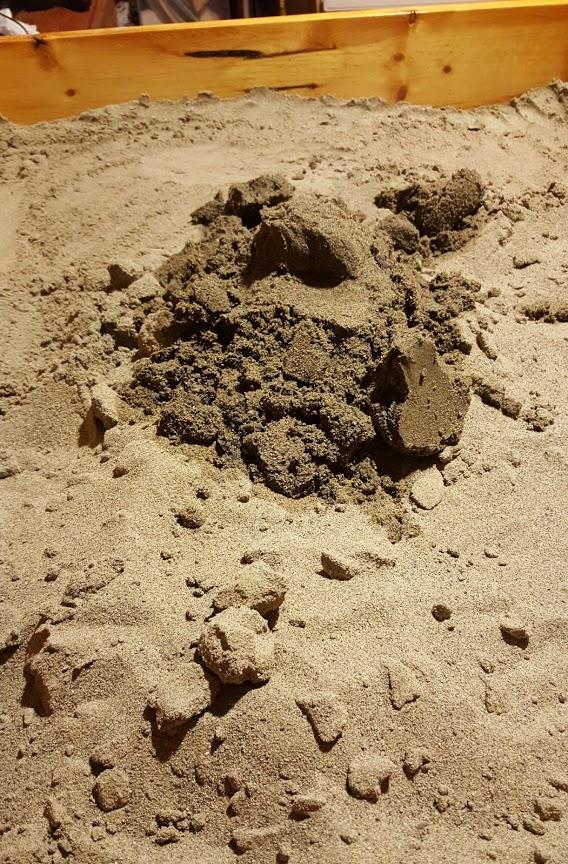
Photo: batch of freshly washed sand on top of older washed sand. Clumping in dry stuff indicates still some silt/clay present, but it’ll do.
Used an old Black & Decker workbench whose top had long since rotted away for the stand. Painted 5/8″ flooring plywood for the base, 1″x5″ pine planks for the sides.Box is made to be removable from the stand for portability (nuts should be replaced with wing nuts so no tools needed).
Luggage handles on sides so can be carried flat. 28.5″ x 39″ so should fit through most doorways on the level (no need to empty sand, provided handles strong enough; remains to be tested).
Camera and projector suspended from standard metal shelving brackets, held to box with clamps for easy removal and repositioning. After the optimum placements have been determined will replace the twisty wrap fasteners with something more solid (yet to be designed).


Calibration wand. A compact disk with white paper glued on top side, then cross hairs pencilled in. Handle made from coat hanger wire bent in a funky “u” to provide wider hand grip and support left and right sides of cd (allows steadier positioning).


